
Basketball is one of the most popular sports in the world. The spirit of basketball remains the same whether played in a professional arena or just in someone’s backyard. Make a basketball hoop may be a satisfying project for fans who want to add a personal touch to their game. This detailed tutorial will show you how to build a basketball hoop from the ground up.
Professional Hoop:
1. Gathering Materials and Tools
- Metal rod (12mm diameter)
- Flat metal sheet (4mm thickness)
- Wood disc or rim
- Wire (for net brackets)
- Backboard material (plywood or similar)
- Paint (for backboard and ring)
- Waterproofing material (if using MDF backboard)
- Welding equipment
- Clamps
- Drill
- Saw
- Paintbrushes
Before embarking on the construction journey, it’s crucial to gather all necessary materials and tools to streamline the process.
2. Forming the Ring
Begin by selecting a suitable metal rod (approximately 12mm in diameter) to Make a Basketball Hoop ring. The standard basketball ring diameter is 450mm (18 inches), but you can adjust the size according to your preference.
Explore: Homemade Basketball Hoop for Your Room: A DIY Guide to Indoor Fun
Using a wood disc or rim as a former, wrap the metal rod around it to form the ring shape. Ensure the former’s diameter is slightly smaller than the desired ring size to account for expansion. Once the rod is bent into a complete circle, overlap the ends and weld them together. Use clamps to hold the overlapped ends in place during welding. Finally, flatten any protruding edges by gently hammering the ring flat.
3. Constructing the Ring Frame
Cut a piece of flat metal sheet (approximately 4mm thick) to create the support structure for the ring. Bend the metal sheet to form a bracket that will attach to the backboard.
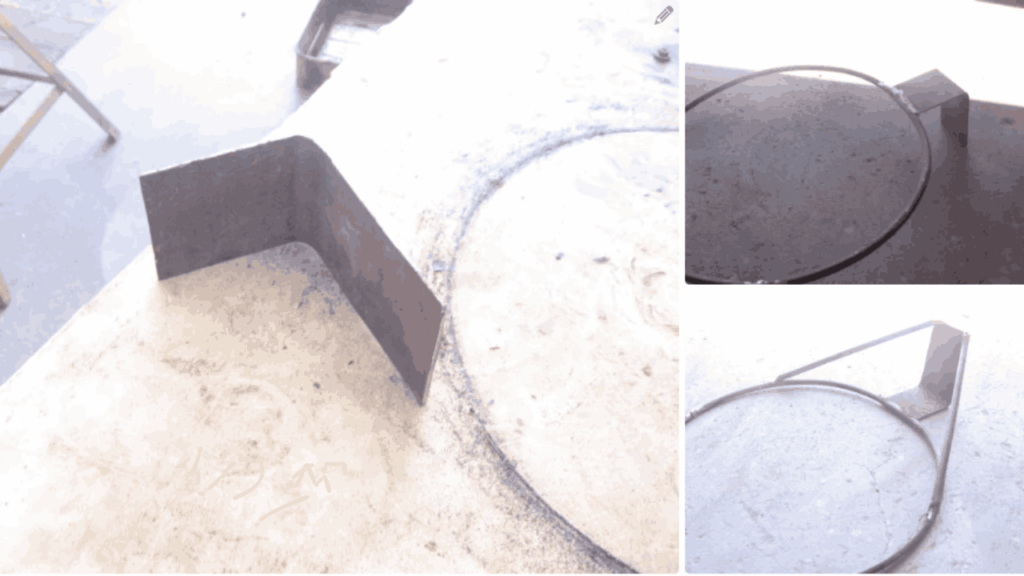
Weld the bracket securely to the flat spot on the ring. Additionally, cut two metal rods (approximately 320mm long) to serve as support arms. Weld these rods to the bracket, ensuring they are evenly spaced and aligned.
4. Optional: Adding Net Brackets
If you prefer to include a net with your basketball hoop, you can add net brackets to the ring. Cut twelve pieces of wire (approximately 90mm long) and bend them in the middle to form clips.
Attach the wire clips evenly around the ring, dividing it into twelve equal parts. Weld the clips securely to the ring, ensuring they are positioned to hold the net in place when Make a Basketball Hoop.
Explore: How to Make a Basketball Hoop Outside with String?
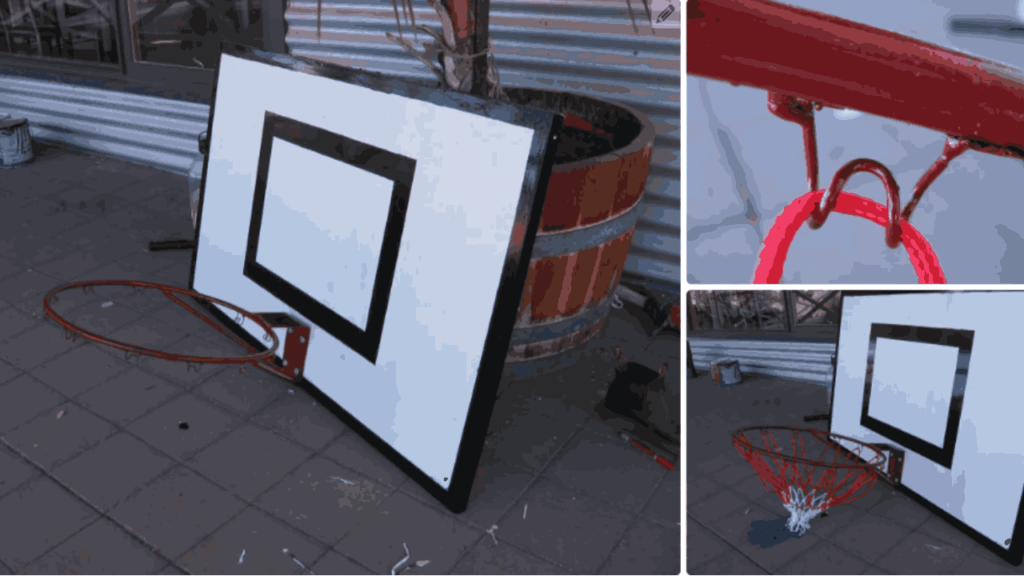
5. Designing the Backboard
Select a suitable material for the backboard to Make a Basketball Hoop, such as plywood, and cut it to the desired size. The standard backboard dimensions are approximately 1100mm wide by 700mm tall by 25mm thick, but you can adjust the size to fit your space.
Mark the center of the backboard and drill holes for attaching it to the ring frame. Additionally, mark any lines or designs you wish to paint on the backboard for added customization.
Explore: How to make basketball hoop out of wood? 4-Steps
6. Painting the Backboard and Ring
Before painting, apply a primer to the backboard to ensure better adhesion of the paint. If using MDF (Medium-Density Fiberboard) for the backboard, waterproof the edges to prevent moisture damage.
Carefully paint the backboard and ring using weather-resistant paint in your desired colors. Apply multiple coats for a smooth and durable finish, allowing each coat to dry completely before applying the next to Make a Basketball Hoop.
7. Assembling the Components
Securely bolt the ring to the backboard using the pre-drilled holes. Ensure the ring is centered and aligned properly before tightening the bolts.If you’ve added net brackets, attach the net securely to the ring using the welded clips. Ensure the net hangs evenly and securely to facilitate gameplay.
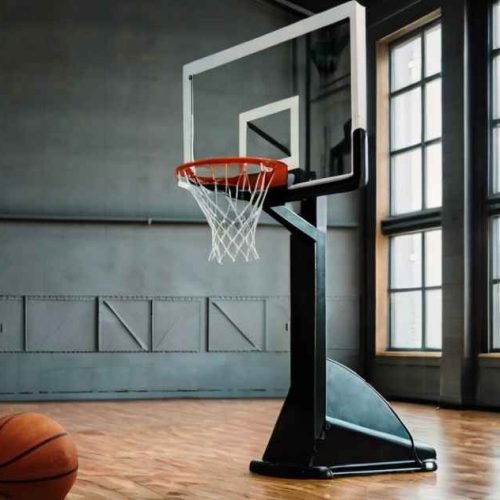
8. Mounting the Hoop
Select a suitable location for mounting your basketball hoop to Make a Basketball Hoop, such as the side of a shed or a designated pole in your backyard. Ensure there is ample space for gameplay and that the area is free from obstacles.
Depending on the chosen location, use appropriate mounting hardware such as heavy-duty wood screws or bolts to secure the hoop in place. Ensure the hoop is mounted at the standard height of 3 meters (10 feet) above the ground for regulation gameplay.
How to Make a Basketball Hoop Stand easy? DIY Basketball hoop
1. Materials Needed
Before you start to Make a Basketball Hoop, gather all the necessary materials. You’ll need items such as PVC pipes, wood for the backboard, a hoop, netting, screws, and paint. It’s essential to use high-quality materials to ensure the durability and longevity of your hoop.
Explore: DIY Basketball Hoop Stand: Your Sports Haven in 4 steps
2. Choosing the Right Location
Consider where you want to install your basketball hoop. Whether it’s indoors or outdoors, make sure you have enough space for a full range of motion while playing. Outdoor hoops require sturdy support, while indoor hoops may need to be attached to walls or doors.
3. Building the Hoop Structure
Start by constructing the hoop’s frame using PVC pipes or metal rods. Follow a step-by-step guide to ensure proper assembly, and be sure to reinforce the structure for stability. Consider adding braces or supports to prevent wobbling during play.
You can also use wire hanger but make sure it doesn’t bend with the basketball weight.
4. Attaching the Backboard
The backboard is an essential component to Make a Basketball Hoop. Choose a material such as acrylic or tempered glass for durability. Attach the backboard securely to the hoop structure, ensuring it’s level and stable.
Explore: How to make homemade basketball hoop of cardboard?
5. Installing the Rim and Net
Select a rim that matches the size of your backboard and hoop. Attach it securely to the structure, making sure it’s at the regulation height. Add a net for the authentic basketball experience, ensuring it’s properly attached and free from tangles.

6. Painting and Finishing Touches
Once the hoop is assembled, you can customize it with paint and decals. Choose colors that match your preferences or your team’s colors. Apply a protective finish to weatherproof the hoop and prolong its lifespan.
7. Maintenance and Care
To keep your basketball hoop in top condition, perform regular maintenance checks. Tighten any loose screws, inspect the backboard for cracks, and clean the netting regularly. Consider adding weatherproofing treatments to protect against the elements.
8. Additional Features and Accessories
Enhance your basketball hoop with additional features and accessories. Install lights for night play, or add a scoreboard to keep track of scores. Get creative with customization options to make your hoop stand out.
Safety Measures
Safety should always be a priority when building a basketball hoop. Ensure the structure is stable and secure to prevent accidents. Consider adding padding around the backboard and hoop to minimize injuries during play.
Benefits of DIY Basketball Hoops
Building your own basketball hoop offers several advantages. Not only is it cost-effective compared to purchasing a pre-made hoop, but it also allows for personalized design options. Plus, it’s a rewarding DIY project that you can enjoy for years to come.
FAQs
Q1: How much does it cost to build a basketball hoop?
A: The cost of building a basketball hoop varies depending on the materials used and the customization options. However, it’s generally more affordable than purchasing a pre-made hoop.
Q2: How long does it take to build a basketball hoop?
A: The time it takes to build a basketball hoop depends on your level of experience and the complexity of the design. It can range from a few hours to a couple of days.
Conclusion
Building a basketball hoop is a fun and rewarding project that can enhance your gaming experience. By following these steps and tips, you can create a customized hoop that provides hours of entertainment for you and your family. Get started today and enjoy the thrill of shooting hoops in your own backyard or driveway!

2 Comments
[…] Explore: How to Make a Basketball Hoop ? […]
[…] Explore: How to Make a Basketball Hoop ? […]